|
1. my process from start to finish first starting with drawing key movements and then acting them out to help form them in my drawings below my frame area. After that I draw some in-betweens and the first frame as well. FInally I begin to animate my project and use my diagram to aid while slowly transitioning to the next key frame. 2. In my animation, I used almost every principle of animation except for squash and stretch, appeal, and solid drawing. 2)Anticipation- This element is used in the animation when the person begins to pull their arms together and lines around the body are shown signifying stress. 3)Staging- When the bag catches on fire everything else is basically paused to keep focus on the burning bag 4)Pose to Pose- Pose to Pose isn't directly shown in my animation, but when planning it out I used pose to pose to make sure I had my movements correct. 5)Follow Through- I used this element when the person's arm is retracting back into its original position, then after they power up, while waiting for the arm to come back. 6)Slow-Out and Slow-In- While the person is punching the arm goes in fast however slowly comes back to show the person's embarrassment. 7)Arc- I used arc to help guide my arm's movement to make it flow. 8)Secondary Action- I used secondary action when I had the aura flow while a piece of it drifted away toward the bag at the same time. 9)Timing- Timing is shown when the aura goes away and for a few frames nothing happens, but then the bag spontaneously catches on fire. 10)Exaggeration- As the person punches and realizes they missed a large drop of water and blushes come up to exaggerate and focus of the person's embarrassment 3. I think stop motion is a very old fashioned, but useful, way of animating. This is because it introduces you to animating and shows different ways of drawing body movements. Link: https://www.youtube.com/watch?v=ghkSDtZwhEM This is my original story board however I changed my idea so after creating it, but just went with whatever was in my head instead of creating a storyboard. This is because it was much simpler and I was able to easily remember it. 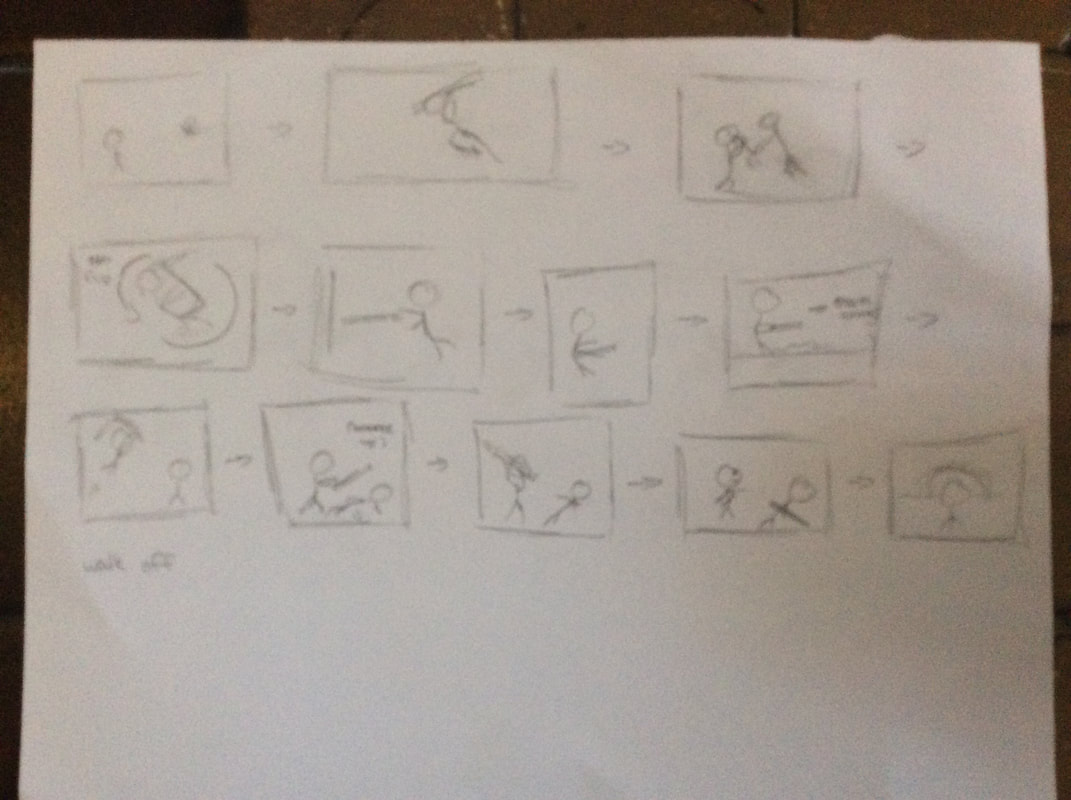
1 Comment
4/24/2024 06:24:20 am
Nice Blog! Automated rigging simplifies the animation process by automatically generating skeletal structures for characters or objects. This streamlines workflow, as software analyzes mesh geometry to determine optimal joint placement and hierarchy. Automated rigging systems create controls and deformers swiftly, reducing manual labor for animators. By expediting rigging processes, they enable faster production of animated content with natural movement and improved efficiency. Leave a Reply. |
AuthorWrite something about yourself. No need to be fancy, just an overview. Archives
November 2017
Categories |
 RSS Feed
